Rotary Encoder
This chapter will show you how to connect a rotary encoder to your Arduino board and read the rotation value in JavaScript.
What is a rotary encoder?
A rotary encoder looks a lot like a potentiometer. It has a knob you can turn in both directions. But there is one big difference: Other than a potentiometer, there is no start- and endpoint while turning it. You can keep turning the knob without an end. While you rotate the knob, you can “feel” it click into position.
Connecting the rotary encoder with p5js
The basic syntax is:
let rotary = connectSensor( SENSOR_ROTARY_ENCODER, pins, minValue, maxValue, startValue );
When adding the sensor you will need to tell p5js, which digital pins on your Arduino are connected to the
clk, dt and sw connections on the rotary encoder. To do so, you will have to pass an object
as pins argument:
let rotary = connectSensor( SENSOR_ROTARY_ENCODER, {clk:5, dt:4, sw:3} );
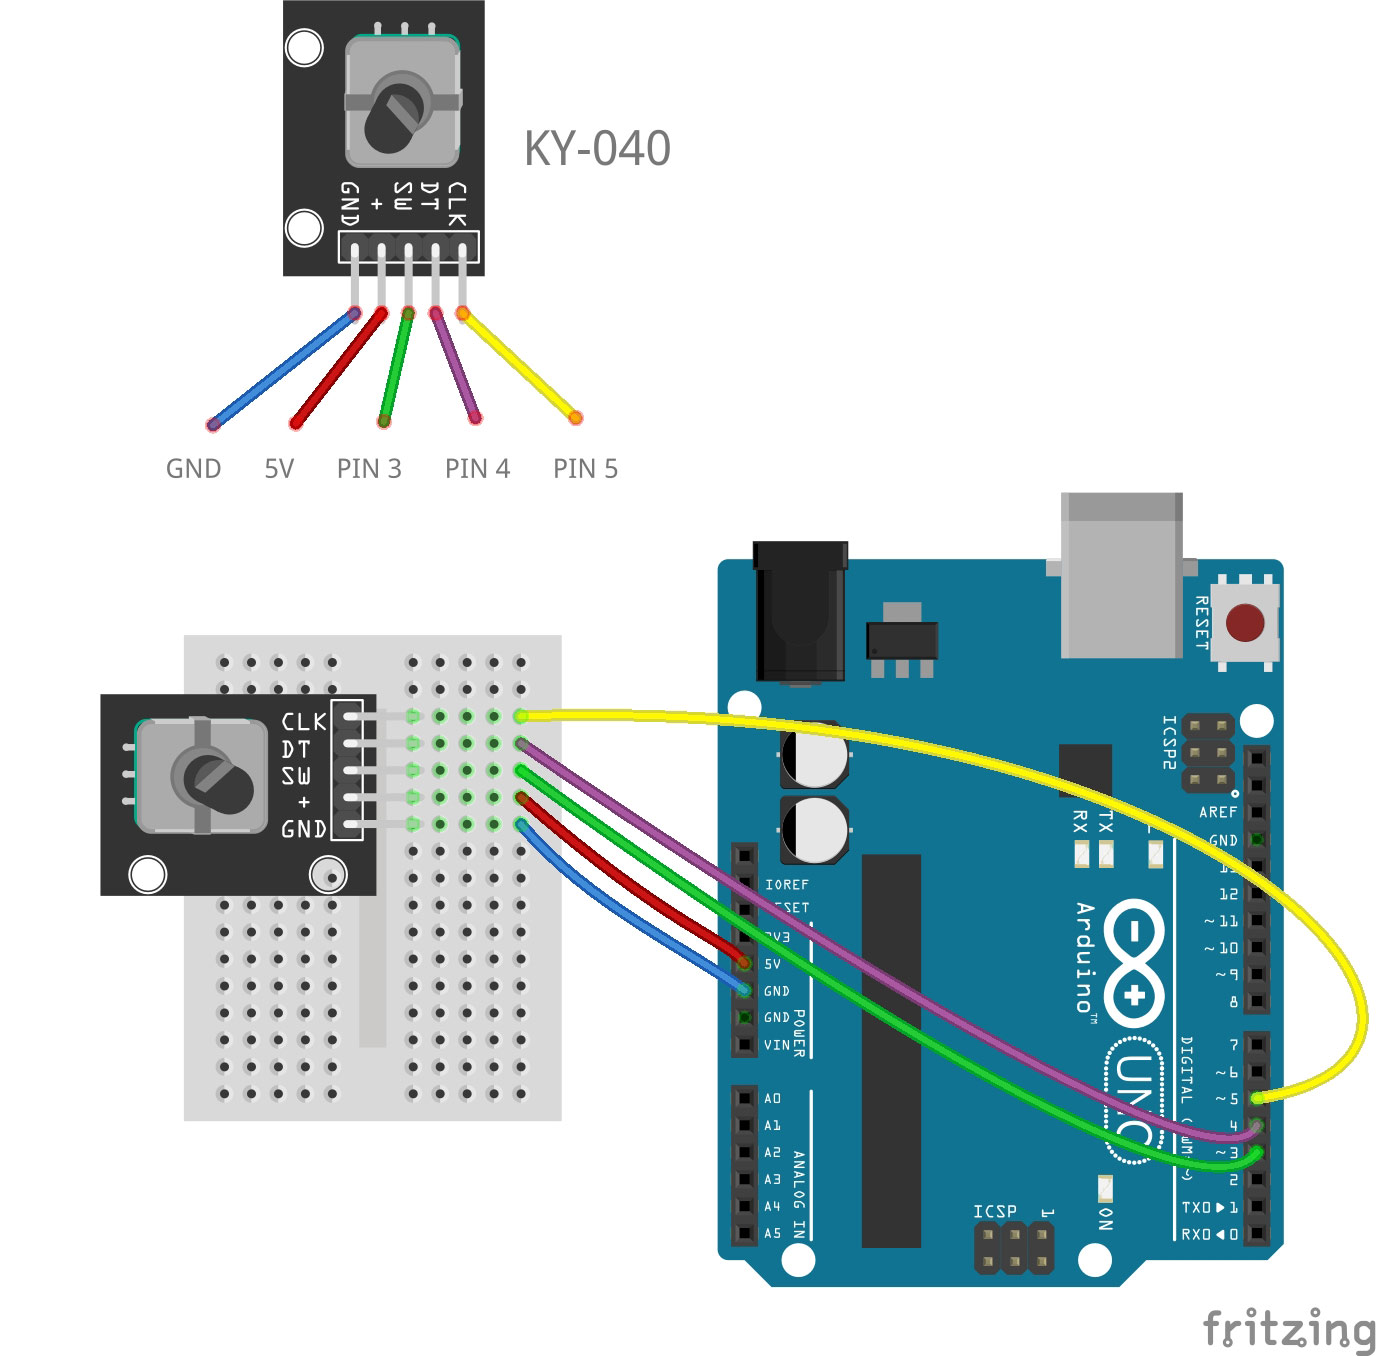
Note that - unlike a normal potentiometer - the rotary encoder needs to be connected to digital pins. In the example above we are using the digital pins 3, 4 and 5.
As there is no start and endposition, you can also let p5js create a virtual start- and endpoint. In the following configuration, no matter how far you rotate the knob to the left, the value will never be less than 10. And in the other direction the value will never exceed 30:
let rotary = connectSensor( SENSOR_ROTARY_ENCODER, {clk:5, dt:4, sw:3}, 10, 30 );
If you would like to define a start value, add it as the last argument. Here we are starting with the value 20 so we can rotate the knob 10 positions to the left and 10 to the right:
let rotary = connectSensor( SENSOR_ROTARY_ENCODER, {clk:5, dt:4, sw:3}, 10, 30, 20 );
Hardware
Wiring
Code
let rotary;

function setup () {
   createCanvas(400, 400);
   rotary = connectSensor( SENSOR_ROTARY_ENCODER, {clk:5, dt:4, sw:3}, 0, 50, 25 );
}

function draw () {
   background( 255 );
   textSize( 32 );
   text( rotary.value(), 200, 200);
}